Smile Daisy: A Designer’s Take on a Classic Embroidery Motif
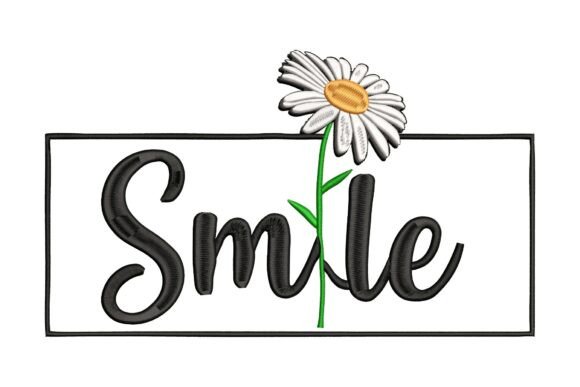
When you’ve worked with as many machine embroidery designs as I have, you learn to spot the ones that will actually earn their place in your workflow. Smile Daisy caught my attention immediately because it does something rare: it takes a familiar subject and gives it a personality that feels fresh without being gimmicky. This isn’t just another flower in the Single Flowers Plants category. It’s a design that feels like it was built for real products, real customers, and real stitching sessions.
Before I load any embroidery file into my machine, I ask myself a few honest questions. Will this hold up after twenty washes? Will it make someone smile when they pull it out of a gift bag? Can I sell the finished piece without second-guessing the quality? Smile Daisy passed those checks in my mind before I even threaded the needle.
First Impressions and the Mood It Creates
The first thing I noticed about Smile Daisy is how the design balances detail with readability. The daisy shape is clear and recognizable from a distance, but when you look closer, there’s enough stitch work to make it feel substantial. It has a cheerful, open expression that reads as friendly and approachable. That matters more than most designers realize. A motif that looks good on screen can feel flat once it’s stitched, but Smile Daisy has a dimensional quality that suggests it was digitized with the final fabric in mind.
Visually, this design fits naturally into projects that need a soft focal point. It doesn’t scream for attention, but it doesn’t hide either. I see it working beautifully on items meant to feel personal and handmade — the kind of products that customers pick up and hold for an extra second before deciding to buy. That moment of connection is exactly what small shop owners and Etsy sellers need their products to deliver.
A Real Case: The Custom Tote Bag That Sealed It for Me
I tested Smile Daisy on a mid-weight canvas tote bag, the kind you’d sell at a boutique market or use as a branded giveaway for a local business. I wanted to see how the design behaved on a surface that gets handled constantly, stuffed with groceries, tossed into car seats, and maybe even thrown in the wash.
I hooped the tote with a medium-weight cutaway stabilizer, paired the design with a warm cream thread against a navy fabric, and let the machine run. The stitching came out crisp. The satin stitch elements laid down smoothly without that tunnel effect you sometimes get on dense motifs. The fill stitch areas covered evenly, and the running stitch details — particularly around the daisy’s center — held their shape without puckering the canvas.
After the first stitch-out, I washed the tote twice on a gentle cycle. The design held firm. No thread breaks, no distortion, no peeling edges. That kind of durability is what separates a design you use once from one you stock in your craft business lineup for years.
How Smile Daisy Performs Across Different Products
One of the strongest indicators of a well-digitized embroidery design is how it behaves across different fabric types and product categories. Smile Daisy showed real versatility in my tests. Here’s where it stood out:
- Custom apparel and sweatshirt embroidery: On a cotton-blend sweatshirt, the design sat flat and didn’t distort the knit. The daisy’s rounded shape works well on the chest or sleeve without fighting the garment’s natural drape.
- T-shirt embroidery: On lighter-weight tees, I used a tear-away stabilizer and a light topping layer. The design stitched cleanly with minimal show-through.
- Tote bag design: Canvas and twill both handled the motif well. The stitch density felt appropriate — not so dense that it stiffened the fabric, but solid enough to feel premium.
- Baby embroidery: For a onesie or receiving blanket, the design reads as gentle and playful. The daisy’s expression works well for neutral gender gifting.
- Holiday embroidery and gift projects: I can easily see this in a set of tea towels for a spring market or on a pillow cover for a Mother’s Day gift.
- Embroidered patch: Hooped separately on felt with a dense satin border, Smile Daisy made a solid patch that could be applied to aprons, caps, or bags.
For commercial embroidery use, this design has the kind of broad appeal that helps small shop products move quickly. It’s not too trendy, not too generic — it sits right in the sweet spot where customers feel like they’re buying something thoughtful.
Where to Use Smile Daisy Carefully
No design is perfect for every surface, and I always advise embroidery designers and creative entrepreneurs to test before committing to a production run. Here are the situations where Smile Daisy needs extra attention:
- Small hoop sizes: If you’re working with a mini hoop or trying to fit the design into a very tight space, check the hoop size requirements before starting. The detail in the petals and center needs enough room to breathe.
- Textured or fluffy fabrics: On fleece, French terry, or thick sweater knits, the finer running stitch details may sink into the fabric pile. Use a water-soluble topping and test first.
- Stretchy fabrics: On jersey or ribbed knits, stabilizer choice is critical. A no-stretch stabilizer and careful hooping will keep the daisy from distorting.
- Dark fabrics: The design relies on contrast between petals and center details. If you’re stitching on black or deep navy, test your thread colors against the fabric to ensure the daisy’s expression reads clearly.
- Curved surfaces like caps: This design is not specifically shaped for curved hooping. If you use it on a cap front, check the placement and consider whether the daisy’s round shape will align with the curve of the crown.
- Products that need frequent washing: While the design held up well in my tests, any dense stitch areas benefit from a softener sheet or gentle wash cycle to preserve the thread sheen over time.
Visual Appeal, Product Value, and Customer Trust
When a customer buys a handmade product with an embroidered motif, they’re not just paying for the item. They’re paying for the care, the precision, and the sense that someone chose a design that fits the product. Smile Daisy delivers on that front because it looks intentional. It doesn’t feel like stock clip art converted to stitches. It feels like a machine embroidery design that was built by someone who understands thread and fabric.
From a business perspective, designs like this one help build brand consistency. If you’re an Etsy seller or handmade shop owner, using a recognizable motif like this across multiple product types — tote bags, pillow covers, towels, apparel — creates a cohesive look that customers remember. It also makes your printable mockup and digital product preview photos look cohesive when you’re listing items in your shop.
The giftability factor is high. A tote or towel with Smile Daisy stitched on it looks like a present someone actually thought about. That perception drives customer trust and repeat business. For apparel decorators and small business owners, that kind of return on a single design is exactly what you want in your library.
Practical Designer Notes Before You Stitch
Before you commit Smile Daisy to a production run or a custom order, here are the notes I always share with fellow makers:
- Test on scrap fabric first. Every machine and thread brand behaves differently. Run a test stitch-out on a fabric similar to your final product.
- Check thread color contrast. The daisy’s expression depends on clear separation between the petals and the center. A low-contrast thread palette can wash out the detail.
- Review stitch density. If the design feels overly dense for your fabric type, consider reducing the density slightly in your software or using a finer thread weight.
- Confirm hoop size. Make sure the design dimensions fit comfortably within your hoop without cramming the edges.
- Inspect small details. Zoom in on the embroidery file before stitching. Look for any jump stitches or tiny elements that might need editing.
- Test in black and white mockups. Viewing the design without color helps you evaluate the shape and balance on its own merit.
- Compare light and dark fabric backgrounds. The same thread colors can look completely different on white versus black fabric. Test both if your product line includes multiple base colors.
- Use proper stabilizer. For most applications, a medium-weight cutaway or tear-away stabilizer will serve you well. For stretchy or delicate fabrics, adjust accordingly.
- Check licensing before selling. If you plan to sell finished items featuring Smile Daisy or distribute the digital embroidery file as part of a design assets collection, confirm the license terms with the designer or platform where you purchased it. This step protects your craft business and your customers.
Why Smile Daisy Belongs in Your Active Rotation
I’ve tested hundreds of flower motifs over the years, and most of them end up in my archive folder rather than my active stitch folder. Smile Daisy earned a spot in the regular rotation because it does what a good embroidery project design should do: it stitches cleanly, it looks great on real products, and it makes people feel something when they see it. Whether you’re stitching it on a personalized gift for a friend or producing a batch of boutique merchandise for a market, this design holds its own.
If you’re an embroidery designer, digital product seller, or hobbyist looking for a reliable motif that fits the Single Flowers Plants category with real character, Smile Daisy is worth your time. Test it on your machine, put it on a product you care about, and see if it doesn’t make you smile too.